

Roles & Permissions
Purpose: Configure user role categories (RBAC) and map granular capability flags across system modules.
Overview
OwnPay implements a Role-Based Access Control (RBAC) authorization layer. Super-administrators can define distinct roles (e.g. Owner, Customer Support, Accountant) and select precisely which actions users with that role can take. Permissions are grouped logically by modules like Gateways, Payments, People, and Developers.
Getting Here
To access the Roles & Permissions manager:
- Log in to the OwnPay admin dashboard as the super-administrator.
- Under the PEOPLE section in the left sidebar, click Roles & Permissions.
Page Sections
The Roles & Permissions interface is divided into the following key panels:
1. Active Roles List
Lists all created roles defined on the platform:
- ROLE: Human-readable title of the role (e.g.
Owner). - SLUG: System identifier used in database permission checks.
- DESCRIPTION: Text describing the role's scope.
- PERMISSIONS: Total number of permission checkboxes active for this role.
- TYPE: Indicates whether the role is a default
Systemrole or a user-created brand role. - ACTIONS: Click Edit to modify name, description, or assigned capability flags.
2. Available Permissions Grid
A comprehensive index of all permission nodes defined in the codebase, grouped by module:
- DEVELOPERS:
Manage API Keys,View API Keys. - GATEWAYS:
Manage Gateways,View Gateways. - MOBILE:
Manage Devices,View Devices,Manage SMS,View SMS. - PAYMENTS:
Manage Invoices,View Invoices,Manage Payment Links,View Payment Links,Manage Transactions,View Transactions. - PEOPLE:
Manage Brands,View Brands,Manage Customers,View Customers,Manage Staff,View Staff. - SYSTEM:
Admin Access,Manage Domains,View Domains,Manage Plugins,View Plugins,Manage Settings,View Settings,View Audit Log,Balance Verification,View Reports,System Update.
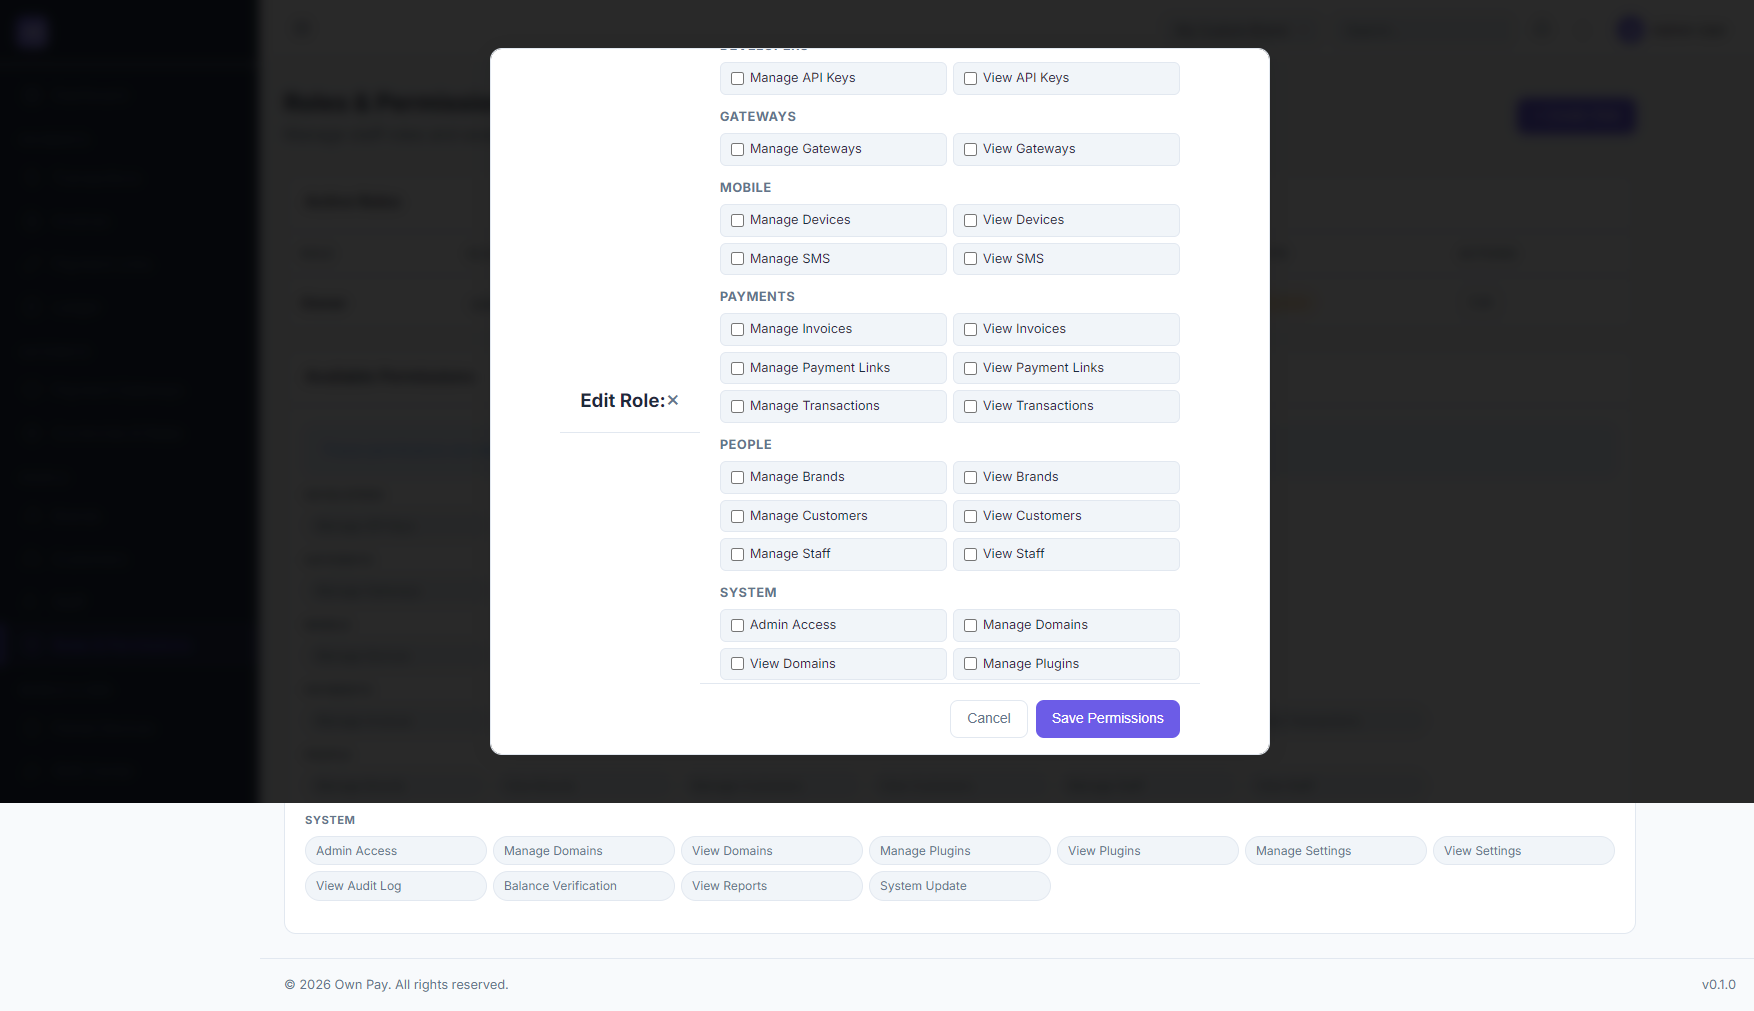
3. Create Role & Edit Role Modals
Slide-out or inline forms to create new roles or edit existing ones, including text fields for Role Name and Description, and a check-box matrix to assign individual permissions.
Fields & Options Reference
Role Form Fields
| Field Name | Type | Required? | Placeholder | Description |
|---|---|---|---|---|
| Role Name | Text Input | Yes | e.g. Finance Manager | The display title of the role. |
| Description | Text Input | No | Brief description | Explain what staff in this role do. |
| Assign Permissions | Checkboxes | No | — | Check individual nodes to map them to the role. |
Step-by-Step: How to Use This Page
Creating a New Custom Role
- Navigate to the Roles & Permissions page.
- Click the + Create Role button.
- In the form, type a Role Name (e.g.
Finance Auditor) and a brief Description. - In the Edit Role section below, select the specific permissions required (e.g., check
View Transactions,View Invoices, andView Reports). - Click the Create Role button to save the new role category.
Modifying an Existing Role
- Find the target role in the Active Roles table.
- Click the Edit button under Actions.
- Modify the name or description, and update checked permission options.
- Click Save Permissions to apply changes. All staff members assigned to this role will have their access permissions updated instantly.
Configuration Guide
- Permissions Resolution Hook:
- When any request is sent to the
/admin/*panel, the system routes the request throughOwnPay\Middleware\PermissionMiddleware. - The middleware matches the route against the defined permission mapping. For example, opening the
/admin/settingsroute requires thesettings.viewpermission. - If the user's role does not contain this permission flag, the request is aborted and a 403 Forbidden page is displayed.
- When any request is sent to the
Best Practices
- ✅ Do: Create specific, restricted roles for external users or support staff (e.g.
Support Staffwho can only view transactions). - ✅ Do: Write clear descriptions for custom roles so other administrators understand their purpose.
- ❌ Don't: Modify default
Systemroles likeOwnerunless absolutely necessary. - ❌ Don't: Give general staff roles access to
Manage API KeysorManage Domainsas these contain sensitive cryptographic credentials.
Must Do
⚠️ Only super-administrators can access and edit the Roles & Permissions panel. Never assign the
staff.managepermission to non-owners, as they could use it to elevate their own permissions or lock out other administrators.