

Balance Verification
Purpose: Reconcile and verify internal database transaction ledgers against actual payment processor states to prevent financial discrepancies.
Overview
The Balance Verification page provides administrators with a direct financial reconciliation tool. It compares your internal double-entry ledger database states (Expected Internal) against the actual processed cash data retrieved directly from the payment gateway APIs (Actual Gateway). It computes the difference (Variance) and alerts you to imbalances.
Getting Here
To access the Balance Verification tool:
- Log in to the OwnPay admin dashboard.
- Under the REPORTS & FINANCE section in the left sidebar, click Balance Verification.
Page Sections
The Balance Verification portal is composed of the following panels:
1. Verification Controls
Located at the top of the workspace:
- Currency Dropdown: Select the target currency context to run the reconciliation on (e.g.
BDTorUSD). - Run Verification Button: Triggers database queries and external gateway checks to perform the audit.
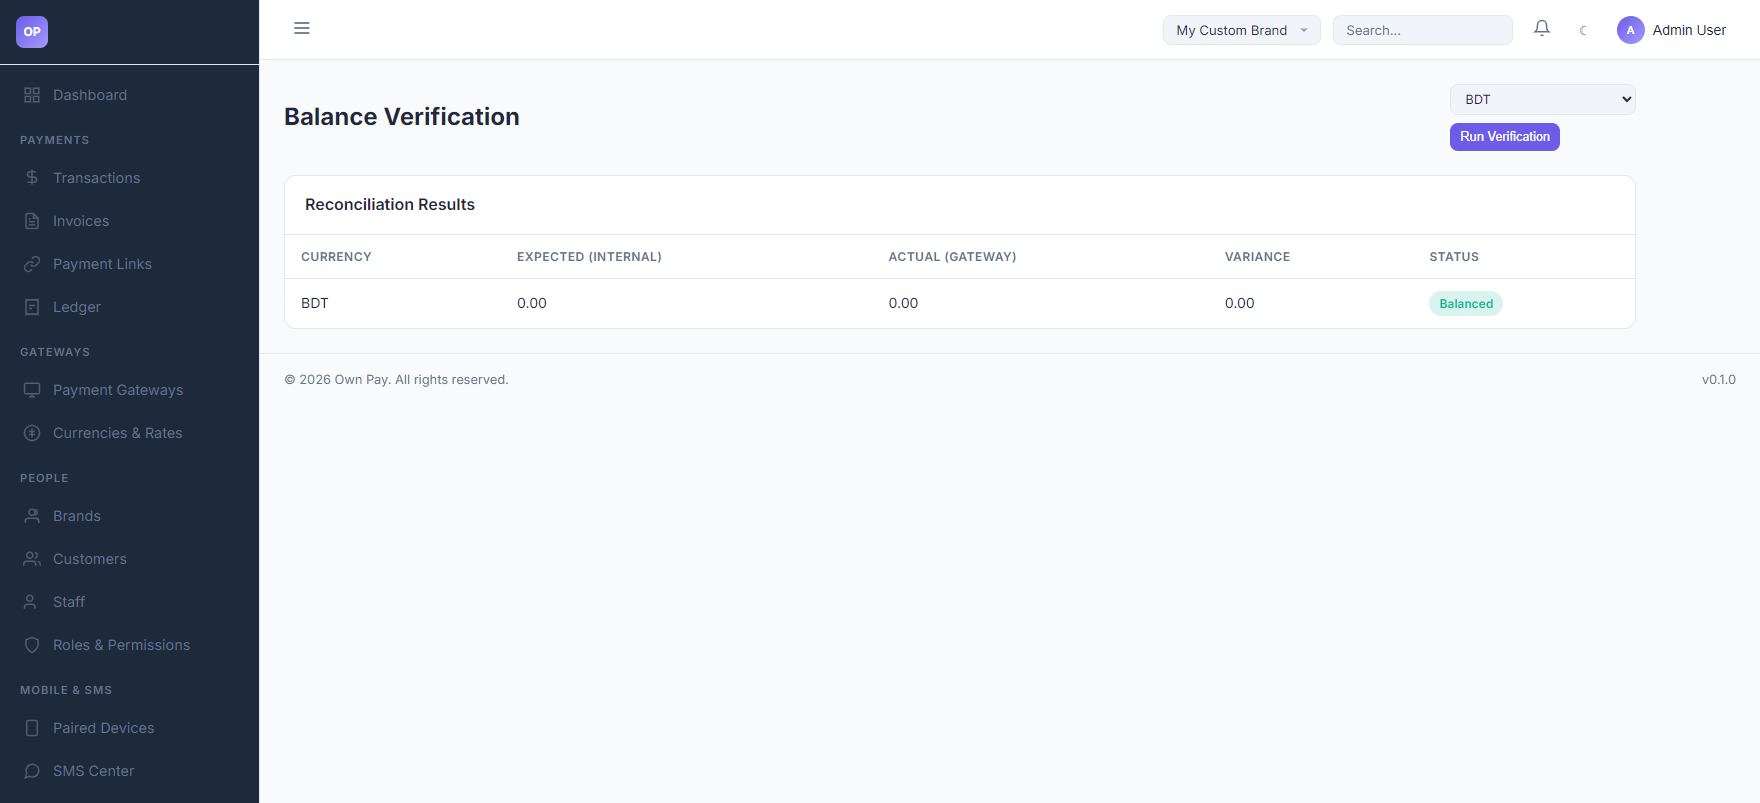
2. Reconciliation Results Table
Displays verification metrics:
- CURRENCY: Audited currency code.
- EXPECTED (INTERNAL): Net total calculated from internal double-entry ledger entries.
- ACTUAL (GATEWAY): Net total compiled from transaction logs registered across payment gateways.
- VARIANCE: The mathematical variance (Expected minus Actual). Ideally, this should show
0.00. - STATUS: Audit state indicator (e.g.,
Balancedin green, orDiscrepancyin red).
Fields & Options Reference
Verification Results Reference
| Table Header | Type | Description |
|---|---|---|
| CURRENCY | Label | The currency denominator of the balance being checked. |
| EXPECTED (INTERNAL) | Currency | Aggregate balance computed from internal ledger entries (op_ledger_entries). |
| ACTUAL (GATEWAY) | Currency | Aggregate balance compiled from physical transaction tables (op_transactions). |
| VARIANCE | Currency | The discrepancy delta. Any non-zero value indicates a balance drift. |
| STATUS | Badge | Indicates whether the ledger balances match the transaction record: Balanced or Variance Detected. |
Step-by-Step: How to Use This Page
Running a Balance Audit
- Navigate to the Balance Verification page.
- Open the Currency dropdown and select the currency to verify (e.g.
BDT). - Click the Run Verification button.
- Scan the table for the STATUS badge:
- If it shows Balanced with
0.00variance, your accounting system is aligned. - If it shows Variance Detected, look at the VARIANCE column value to determine the size of the discrepancy.
- If it shows Balanced with
Configuration Guide
- Discrepancy Resolution Protocol:
- Variance occurs if:
- A transaction failed to write a ledger entry (rare, as database transactions roll back if ledger updates fail).
- A database modification was performed directly without using PSR-11 services.
- Stale cache is showing outdated balance values.
- If a variance is detected, run the system update diagnostics or review the Audit Log entries corresponding to the variance period.
- Variance occurs if:
Best Practices
- ✅ Do: Run balance verifications before making settlements or payout distributions.
- ✅ Do: Perform audits during low-traffic periods to ensure pending checkout sessions do not cause temporary variance fluctuations.
- ❌ Don't: Ignore non-zero variance values, even if they are minor (e.g. pennies), as they indicate potential rounding anomalies or configuration drifts.
Must Do
⚠️ Always post ledger transactions within a database transaction block. If writing custom plugins or addons that interact with balances, utilize the double-entry repository
OwnPay\Repository\LedgerRepositoryto preserve balance integrity.
Related Pages
- Ledger — Inspect individual accounting ledger sheets.
- Transactions — Monitor real-time transaction updates.
- Audit Log — Check modification actions history.